
Create a Static Website with Github Pages
Introduction
In this tutorial, we’ll learn how to create a static website, with free hosting, courtesy of Github. All we’ll need is a simple repository and a markdown file—no HTML, CSS, or code of any kind will be required.
Create a Github repository
To get started, you’ll need a Github account. A free account will suffice for this tutorial.
Once you’ve logged in to your account, click on the Repositories tab, then click New:

You’ll see a short form for filling in details about your new repository. In the Repository name field, enter {your Github username}.github.io. For example, my username is bryantm1123, so my repository name is bryantm1123.github.io.
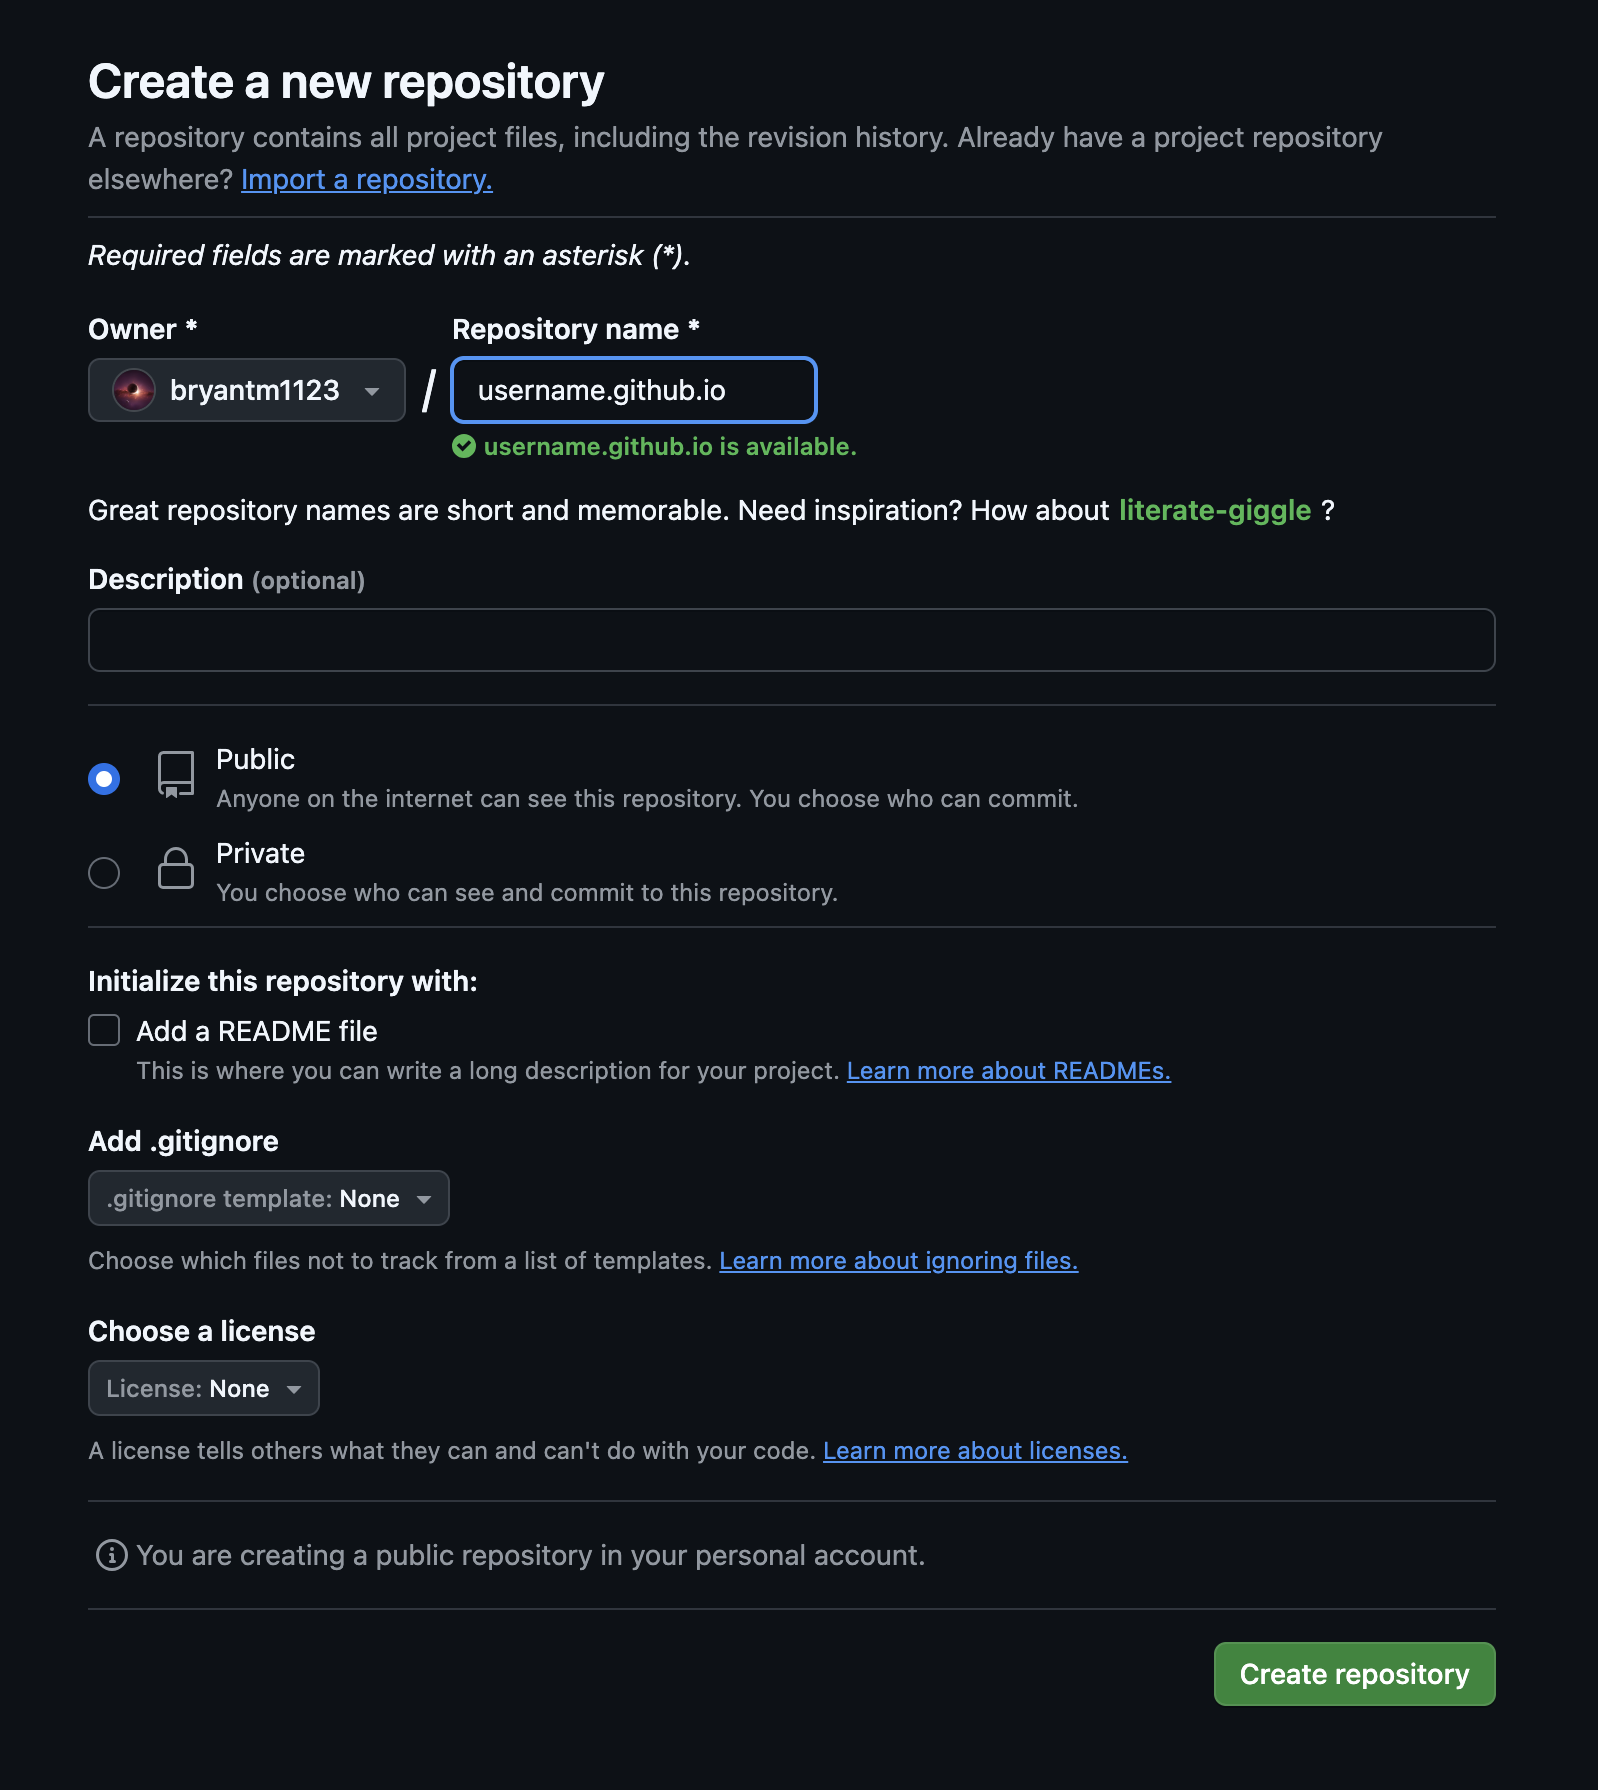
The form also allows you to add a description for your repository, and to set its visibility on Github as either Public or Private—note that your website will be publicly visible on the internet, even if you set your repository’s visibility to private.
There is also an option to add a README file—which I recommend. README files are traditional in software engineering and describe what a project does, and what setup steps are required in order to use it. They’re often written in Markdown, which we’ll use for the website we’re building. So adding a README will provide another opportunity for practice!
Add an index file
Now that we have a new repository setup, let’s add an index file to serve as the landing page for our website. To do this:
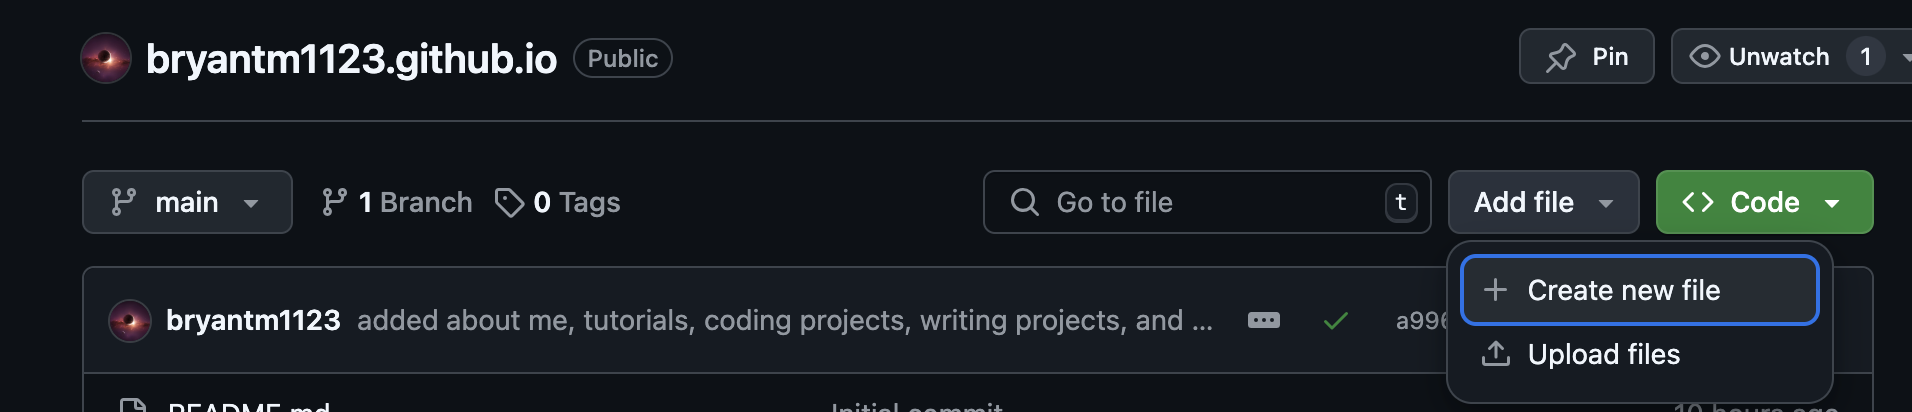
- Navigate to your repository.
- Click the Code tab.
- Click Add file.
- Click Create new file.
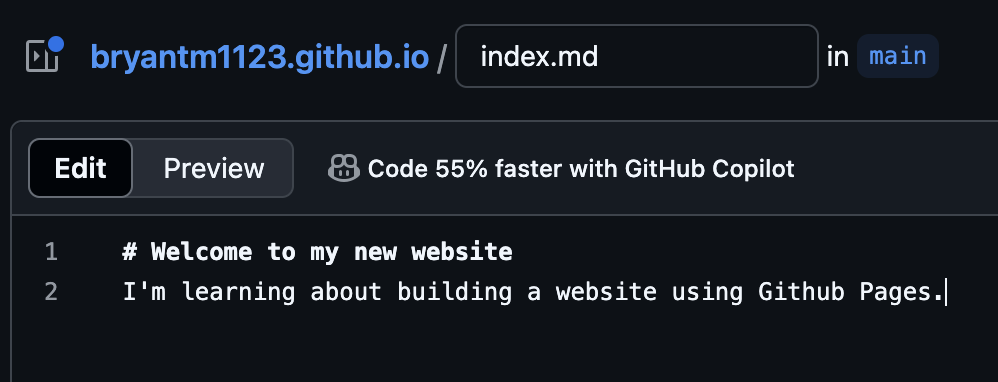
Name the file index.md and using the Edit screen, add a header and description as shown below:
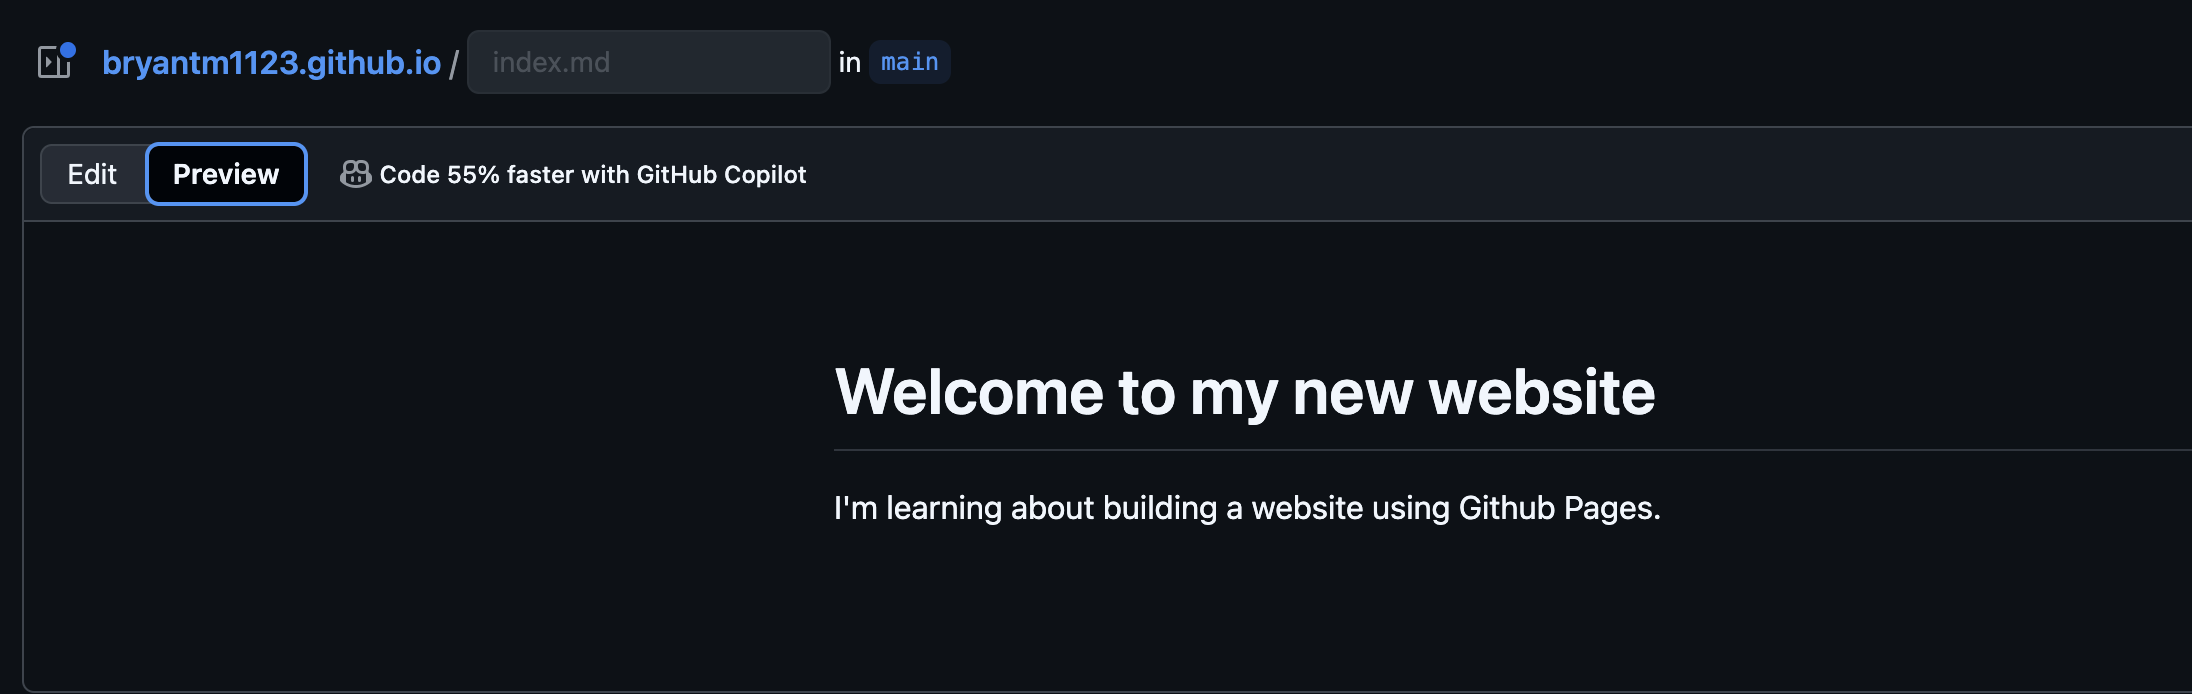
You can preview what the file will look like when rendered by clicking the Preview tab.
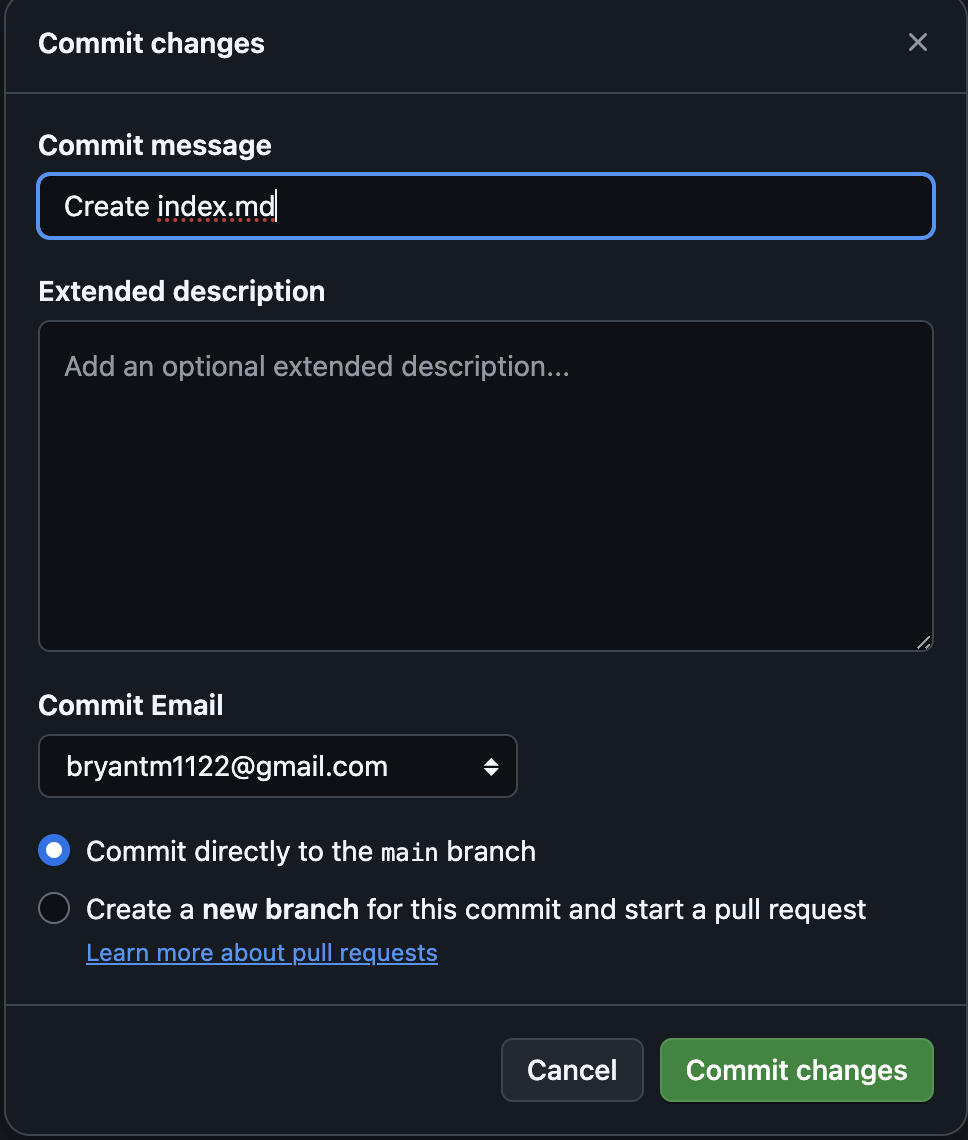
Commit your changes by clicking Commit changes. It’s good practice to write a short commit message describing the changes you made. We’ll also commit this directly to the main branch, which is the default version control branch for publishing updates to our website.
Visit your new website
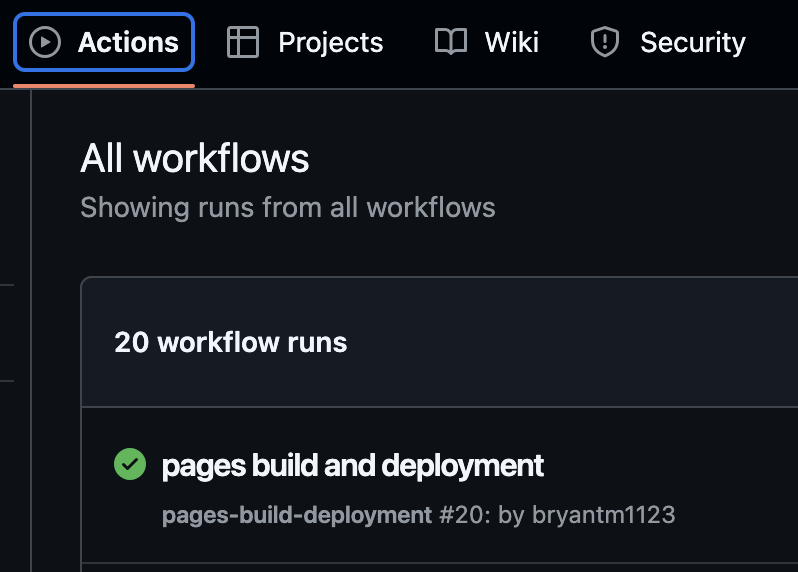
After commiting your changes, Github will automatically publish the latest version of your website. You can monitor this process by navigating to the Actions tab in your repository. Here you’ll see a list of Workflow runs. Click the top entry in the list.
On the next screen, you’ll see a graph showing the status of the build and deployment processes. When in progress, the indicators will be yellow. Upon completion, the indicators will be green with a checkmark.
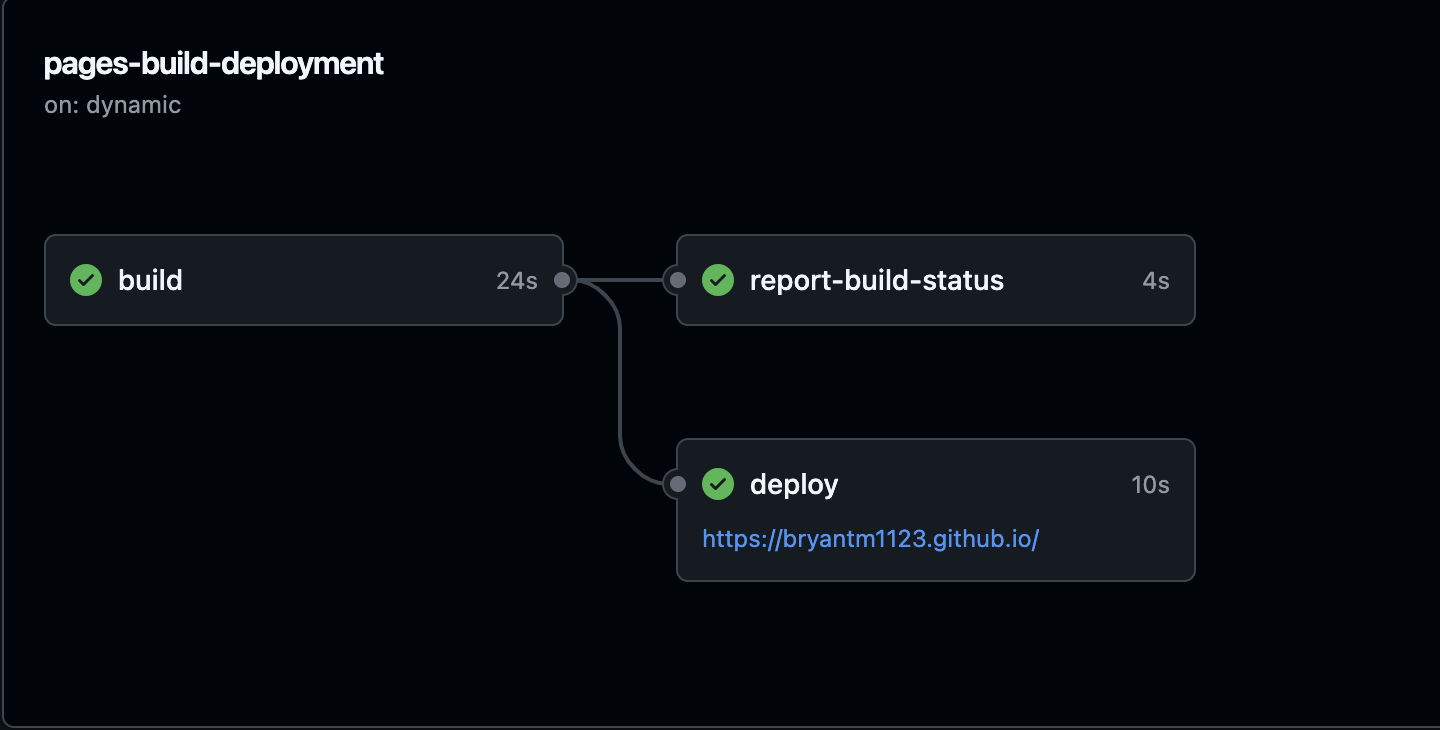
Now your website is ready to view. You can either click the link on the deploy box, or navigate in your web browser to the repository name you created earlier, for example {Your Github username}.github.io—by default, this serves as the domain address for your website. You should now see your shiny new website, open to the landing page powered by the index.md file.
Conclusion
In this tutorial, we learned how to create a static website by using Github Pages. A static website is a good choice for a site that displays information, and doesn’t require interactivity with a user, for example, a blog or portfolio. To learn more about the concepts covered in this tutorial, please see the further reading section below.
Further reading
To learn more about the Git version control system, including branches and repositories, visit https://git-scm.com/.
For more about Markdown and how to format .md files, see https://www.markdownguide.org/
And to get the most out of your Github Page, see the official Github Pages documentation.